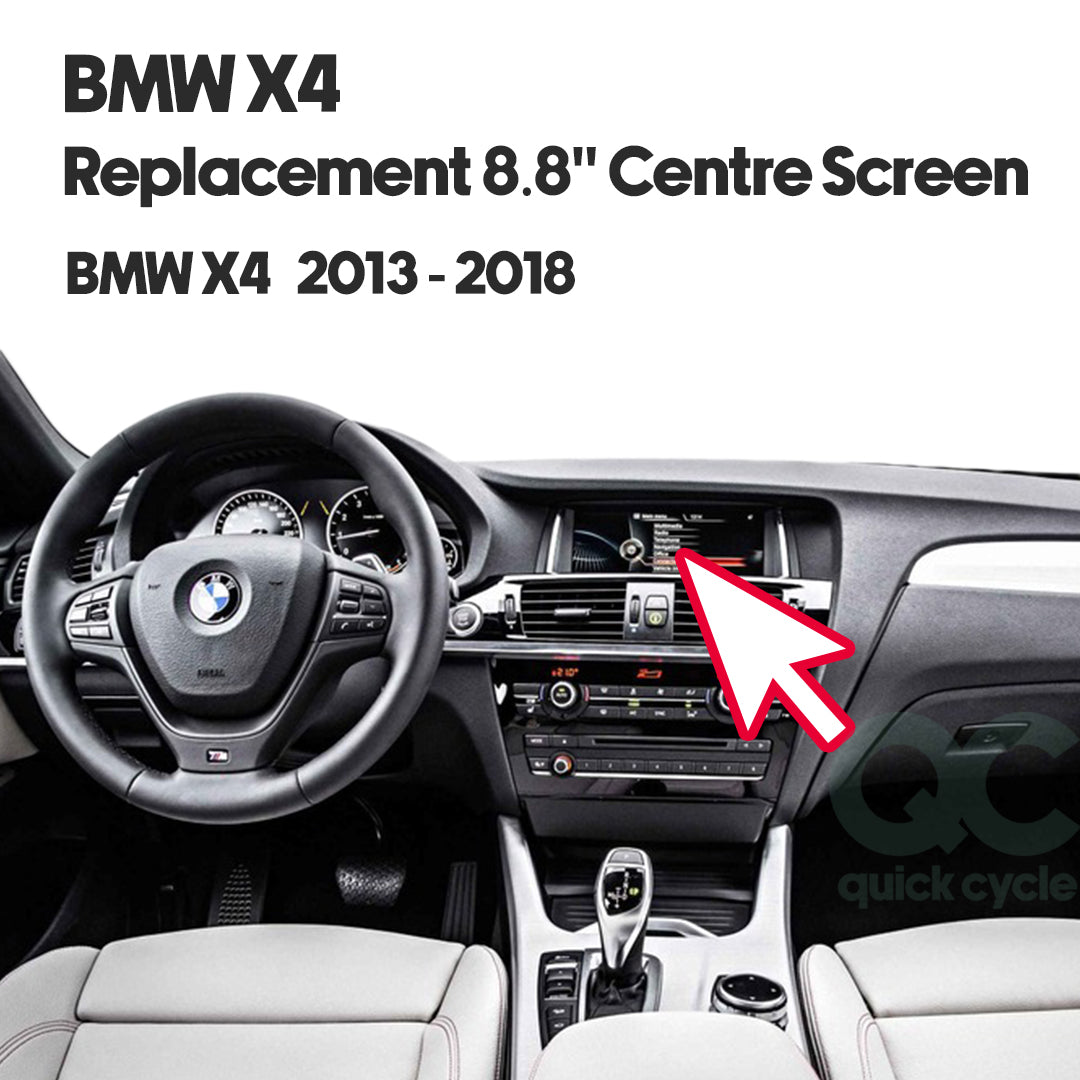
BMW X4 CID screen display part 8.8” F26 2013 To 2018 ALPINE AL2566 LCD NBT EVO
BMW X4 CID screen display part 8.8” F26 2013 To 2018 ALPINE AL2566 LCD NBT EVO
Couldn't load pickup availability
BMW X4 F26 05/2013 — 03/2018 centre console information CID display screen LCD
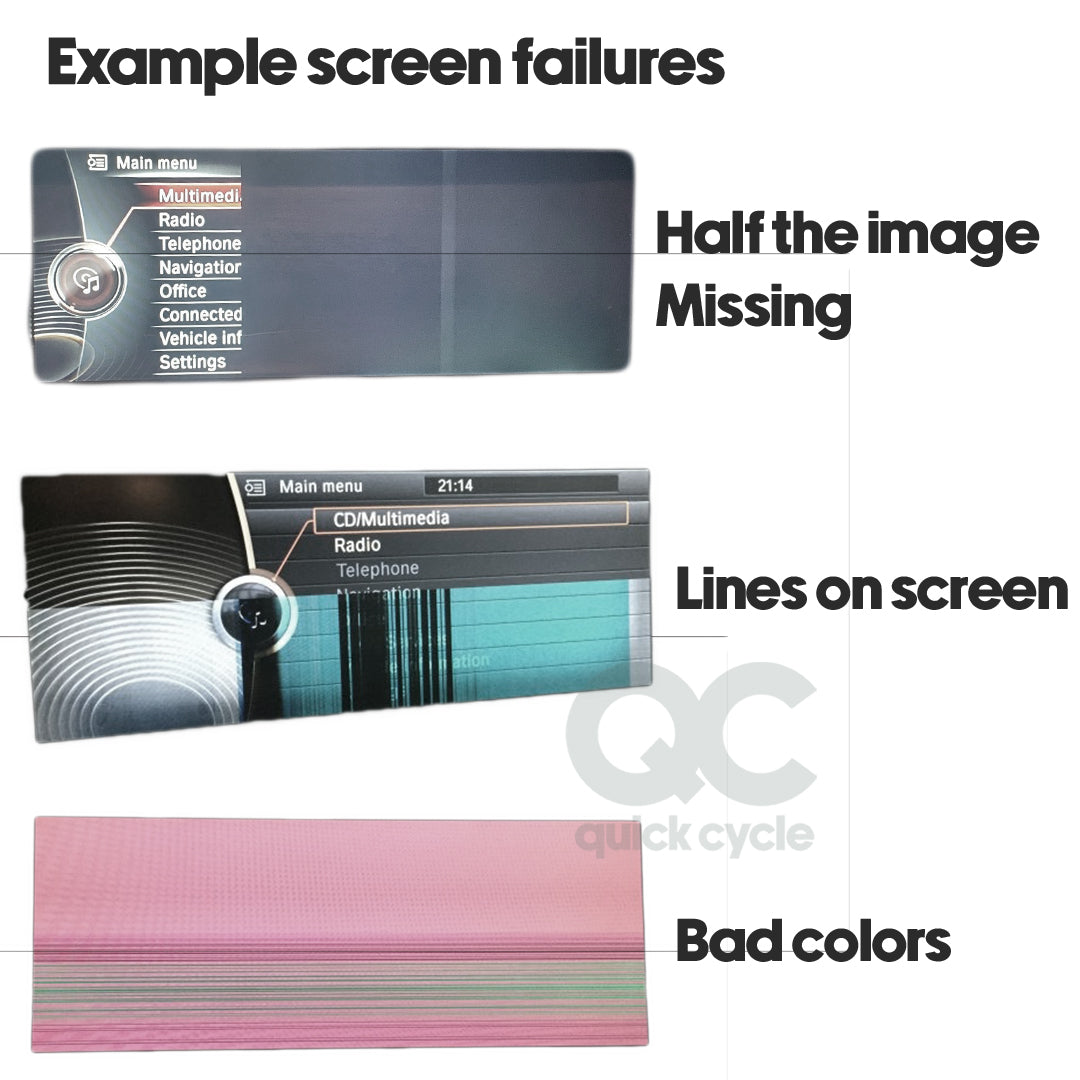
Does your screen have lines or missing pixels across the front that prevent clear viewing?
Replace the specific broken CID LCD 8.8 screen that needs replacing in you dashboard. BMW will only provide the complete assembly at a significant cost. Reduce the cost of your repair by changing the screen inside the display unit. The display unit needs to be removed from the dash and the screen replaced inside. No coding is necessary by replacing the component part.
The replacement screen provided is the original replacement part manufactured by Sharp.
Shipping
Shipping will be completed the same day if purchasing before 4 PM. Option available for next-day shipping option at checkout.
Compatibility
BMW X4 F26 (05/2013 — 03/2018)
Fitted with screen 8.8" screen as imaged, applicable part numbers
If you believe this will fit your vehicle remove the screen module from your car and check the code on the back if it references "8.8 CID" and open and check the screen vs image on the listing, it will likely be compatible. Please message me to confirm prior to order to confirm.
Codes on back of screen module:
BMW 8.8 CID
ALPINE AL2566
BM 9370870
BM 9329953
BM 9329953
BM 9294300
BM 9289584
BM 9231320
BM937087001W
BM 9370870 01 W
BM937087001
BM 937087001
BM 9329953 04 9
BM 9329953049
BM9329953049
65509370870
65509365666
65509329953
65509294300
65509289584
65509231320
65506822625
Instruction
Basic instruction for guidance – No liability is accepted for loss or damage by following the guide below.:
- Remove the trim panel with AC vents and Start Button by gently prying from the bottom with a nylon trim tool if needed to loosen and pull the panel straight out.
- Unscrew the 2, T20 Torx screws from the bottom left and right of the display housing
- Unplug the purple connector (the worst part of the DIY). There is a tab on the side to push in and it takes a lot of force and wiggling to pull it off the back of the display.
- Separate the black trim piece from the display assembly by gently prying the side and bottom black tabs up over the short metal posts
- unscrew the Phillips screw next to the connector holding the LCD panel and circuit board assembly
- Remove the circuit board from the flexible metal brackets on the back of the LCD panel
- Disconnect the small and large ribbon cables connecting the LCD panel to the circuit board that has the connection by lifting up the locking black flaps
- Move over the 4 sticky pads from the old LCD panel to the new one.
- Connect the new LCD panel to the circuit board through the small and large ribbon cables. Make sure the ribbon cables are fully seated and the tabs on the cables match up with the indentations on the connectors before locking the cables in place.
- Attach the circuit board to the back of the LCD panel into the metal brackets and assemble the display housing.
- Install it back into the car in the reverse of removal.
- If you get a message on the display saying "no signal" or something similar, do a system reset by pressing and holding the volume knob for ~30 seconds.
Share